ค้นหาบน Youtube!

Ledger Live คือ

Ledger Wallet (formerly Ledger Live) is a comprehensive cryptocurrency management application that pairs with Ledger hardware wallets to provide secure portfolio tracking, staking, swapping, and DeFi access across 5,500+ digital assets.

Ledger Live เป็นแอปพลิเคชันที่ทรงพลังออกแบบมาเพื่อให้ผู้ใช้ควบคุมประสบการณ์ดิจิทัลได้อย่างเต็มที่ Ledger Live ช่วยให้คุณจัดการกิจกรรมอย่างปลอดภัยในขณะที่ปกป้องข้อมูลของคุณ โดยผสมผสานความสะดวกใช้งานกับความปลอดภัย Ledger Live ทำหน้าที่เป็นศูนย์กลางสำหรับทุกกิจกรรม

วิธีการทำงาน Ledger Live

Ledger Live เชื่อมต่อโดยตรงกับบัญชีของคุณ ทำให้มั่นใจว่าข้อมูลที่ละเอียดอ่อนจะไม่ออกจากอุปกรณ์ การดำเนินการทั้งหมดต้องได้รับการยืนยัน เพื่อปกป้องผู้ใช้จากการเข้าถึงที่ไม่ได้รับอนุญาต Ledger Live ทำหน้าที่เป็นอินเทอร์เฟซ ในขณะที่ความปลอดภัยถูกบังคับใช้ในทุกระดับ

คุณสมบัติหลักของ Ledger Live

Follow these steps to set up Ledger Wallet and start managing your crypto portfolio with hardware wallet security TL;DR — Quick Setup Steps Download Ledger Wallet for desktop (Windows, macOS, Linux) or mobile (iOS, Android) Connect your Ledger hardware wallet via USB or Bluetooth and complete the pairing process Run the security checklist to verify device authenticity and update firmware Add cryptocurrency accounts for Bitcoin, Ethereum, and any other supported networks Start sending, receiving, staking, and swapping — all secured by hardware wallet signing Setting up Ledger Wallet is a straightforward process that takes approximately 15–20 minutes from download to your first transaction. This guide walks you through each step in detail, ensuring your hardware wallet is properly configured and secured before you begin managing your digital assets. If you are new to Ledger, we recommend reading our features overview first to understand what the application offers.

การจัดการสินทรัพย์ใน Ledger Live

The application is available for Windows 10 or later (64-bit), macOS 12 Monterey or later, Ubuntu 20.04 LTS or later, iOS 15 or later, and Android 10 or later. Always download from the official Ledger website or official app stores to avoid counterfeit applications. Install the application by following the standard installation process for your operating system.

ความปลอดภัยเป็นหัวใจ

Mobile versions are available through the Apple App Store and Google Play Store respectively. When you launch Ledger Wallet for the first time, the application will guide you through an initial setup wizard. If you have a new Ledger device still in its packaging, select “Set up a new device”.

Ledger Live และการเก็บรักษาด้วยตนเอง

Step 2: Connect Your Ledger Device Connect your Ledger hardware wallet to your computer using the included USB cable, or pair it via Bluetooth if you are using a Nano X, Stax, or Flex with the mobile application. Ensure your device is powered on and unlocked with your PIN code before attempting to connect. Ledger Wallet will automatically detect your connected device and display its model, firmware version, and connection status.

ซื้อ ขาย และแลกเปลี่ยน

For USB connections, use only the cable provided with your device or a certified USB-C/USB-A cable. Avoid USB hubs or extension cables, as these can sometimes cause unreliable connections. For Bluetooth pairing, ensure Bluetooth is enabled on your mobile device and that your Ledger is in pairing mode (accessible through the Ledger device’s settings menu).

การแลกเปลี่ยนใน Ledger Live

This step is critical for ensuring your hardware wallet has not been tampered with and is operating with the most current security patches. The security checklist performs the following checks: device authenticity verification using Ledger’s cryptographic attestation (confirming the Secure Element chip is genuine and has not been replaced or modified), firmware version check with automatic update prompts if a newer version is available, PIN code verification to confirm you have set a strong PIN, and recovery phrase backup confirmation to ensure you have properly recorded your 24-word recovery phrase. If a firmware update is available, we strongly recommend installing it before proceeding.

การ Staking กับ Ledger Live

The update process is guided within Ledger Wallet and typically takes 5–10 minutes to complete. Your accounts and recovery phrase are not affected by firmware updates. Step 4: Add Cryptocurrency Accounts With your device connected and security checklist complete, you can begin adding cryptocurrency accounts.

สินทรัพย์ Staking ที่รองรับ

Ledger Wallet will prompt you to install the corresponding blockchain application on your Ledger device if it is not already present. Device apps are small programs that run on your hardware wallet and handle the cryptographic operations specific to each blockchain. Installing an app takes just a few seconds and does not affect your existing accounts or seed phrase.

Ledger Live และการเข้าถึง DeFi

You can add multiple accounts for the same network to organize your holdings — for example, separate accounts for savings, trading, and DeFi activities. Step 5: Send & Receive Cryptocurrency To receive cryptocurrency, navigate to the account you want to receive into and click “Receive”. Ledger Wallet will display your receiving address along with a QR code.

การรวม WalletConnect และ DApp

To send cryptocurrency, click “Send” from the relevant account, enter the recipient address and the amount you wish to transfer, and review the transaction details including the network fee. When you click “Continue”, the transaction details are sent to your hardware wallet for signing. Review the recipient address, amount, and fee on your device screen using Clear Signing, then confirm by pressing the physical button or tapping the touchscreen.

Ledger Live มือถือและเดสก์ท็อป

This hardware confirmation requirement is what makes Ledger fundamentally more secure than software wallets — even if malware on your computer modifies the displayed address, the true transaction details appear on your trusted hardware wallet screen. Step 6: Stake Your Assets Navigate to the “Earn” or “Staking” section in Ledger Wallet to begin earning rewards on your proof-of-stake assets. Select the cryptocurrency you want to stake (ETH, SOL, DOT, ATOM, etc.) and choose a staking provider from the available options.

ประสบการณ์ผู้ใช้และอินเทอร์เฟซ

Enter the amount you wish to stake and review the terms. For Ethereum, you can stake any amount through pooled staking providers like Lido or Kiln and receive a liquid staking token in return. For networks like Solana and Cosmos, you delegate directly to a validator of your choice.

ความเป็นส่วนตัวและการปฏิบัติตามกฎระเบียบ

After staking, Ledger Wallet automatically tracks your accumulated rewards, displays your current APY, and provides historical earnings charts. You can unstake your assets at any time, subject to the unbonding period specific to each blockchain network (for example, Ethereum has a variable withdrawal queue, while Cosmos has a 21-day unbonding period). Step 7: Swap Crypto To swap one cryptocurrency for another, navigate to the “Swap” section in Ledger Wallet.

Ledger Live และความโปร่งใส

Ledger Wallet will query multiple swap providers simultaneously and display quotes from each one, including the exchange rate, network fees, and provider fees. Compare the quotes to find the best rate for your specific trade. Rates can vary significantly between providers depending on the token pair, trade size, and current liquidity conditions.

อนาคตของ Ledger Live

The outgoing transaction is signed by your Ledger device, and the received tokens are deposited directly into your hardware wallet account. Supported swap providers include Changelly, 1inch, Paraswap, and others, with coverage spanning hundreds of token pairs across multiple blockchain networks. The entire swap process is completed within Ledger Wallet, with no need to visit external exchanges or connect your wallet to third-party websites, reducing your exposure to phishing attacks and malicious dApps.

Ledger Live ในระบบนิเวศ Web3

Ledger Live ใช้เทคโนโลยีล้ำสมัยเพื่อมอบประสิทธิภาพที่ยอดเยี่ยม ด้วย Ledger Live ผู้ใช้สามารถเข้าถึงฟีเจอร์ที่ออกแบบมาสำหรับทั้งผู้เริ่มต้นและผู้ใช้ขั้นสูง

คู่มือภาพแบบทีละขั้นตอนแสดงวิธีตั้งค่า Ledger Wallet ด้วยอุปกรณ์ฮาร์ดแวร์ ตั้งแต่ดาวน์โหลดแอปไปจนถึงจัดการบัญชีคริปโตเคอเรนซี่
ทำตามขั้นตอนเหล่านี้เพื่อเริ่มต้นตั้งค่า Ledger Wallet และจัดการพอร์ตคริปโตของคุณด้วยความปลอดภัยของกระเป๋าเงินฮาร์ดแวร์
TL;DR — ขั้นตอนการตั้งค่าอย่างรวดเร็ว
  • ดาวน์โหลด Ledger Wallet สำหรับเดสก์ท็อป (Windows, macOS, Linux) หรือมือถือ (iOS, Android)
  • เชื่อมต่อกระเป๋าเงินฮาร์ดแวร์ Ledger ของคุณผ่าน USB หรือ Bluetooth และดำเนินการจับคู่
  • ดำเนินการตรวจสอบความปลอดภัยเพื่อยืนยันความถูกต้องของอุปกรณ์และอัปเดตเฟิร์มแวร์
  • เพิ่มบัญชีคริปโตสำหรับ Bitcoin, Ethereum และเครือข่ายอื่นๆ ที่รองรับ
  • เริ่มส่ง รับ สเตค และแลกเปลี่ยน — ทั้งหมดนี้ได้รับการปกป้องด้วยการลงนามจากกระเป๋าเงินฮาร์ดแวร์

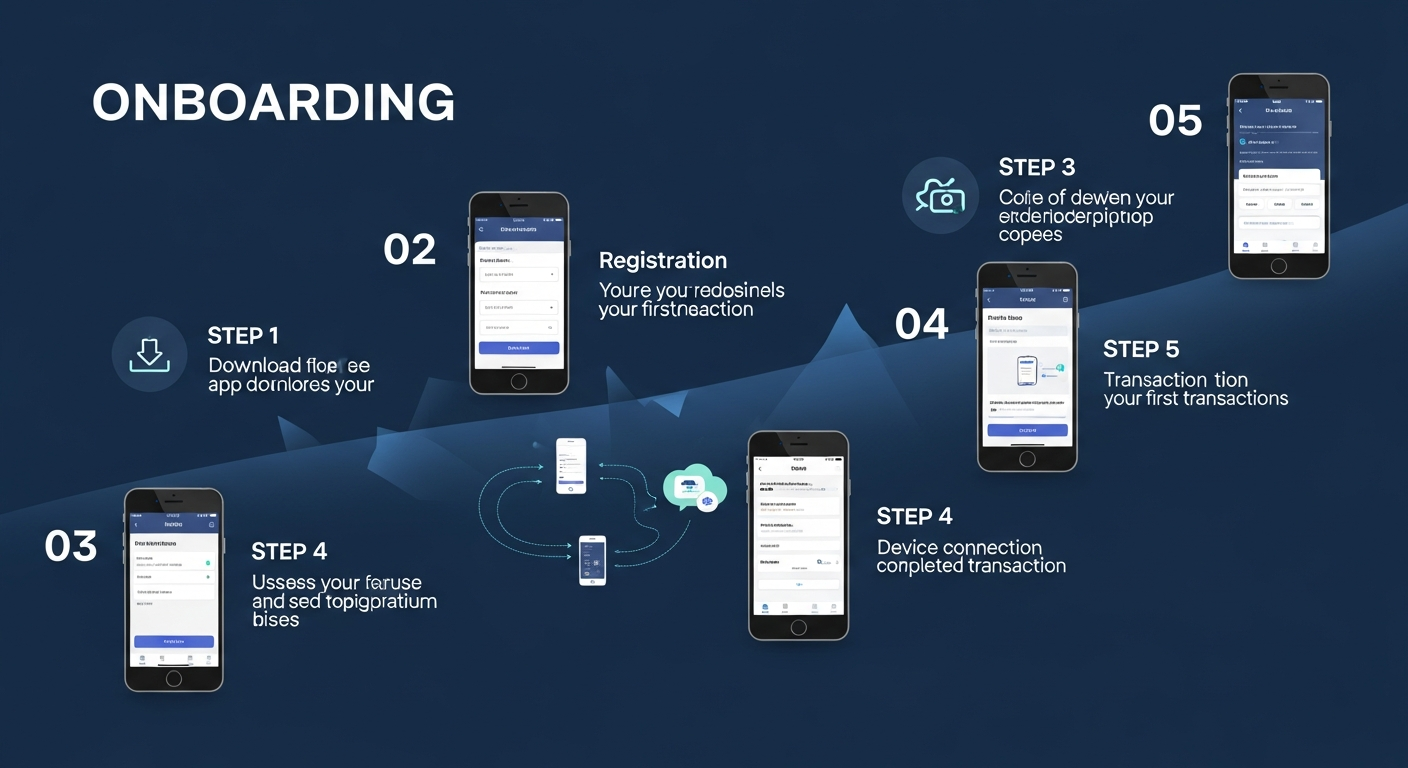
การตั้งค่า Ledger Wallet เป็นกระบวนการที่ง่ายและใช้เวลาประมาณ 15–20 นาทีตั้งแต่ดาวน์โหลดจนถึงการทำธุรกรรมครั้งแรก คู่มือนี้จะนำคุณผ่านแต่ละขั้นตอนอย่างละเอียด เพื่อให้แน่ใจว่ากระเป๋าเงินฮาร์ดแวร์ของคุณได้รับการตั้งค่าและปกป้องอย่างถูกต้องก่อนเริ่มจัดการสินทรัพย์ดิจิทัลของคุณ หากคุณเป็นผู้ใช้ใหม่ของ Ledger เราแนะนำให้อ่าน ภาพรวมฟีเจอร์ ของเราก่อนเพื่อทำความเข้าใจว่าแอปพลิเคชันมีอะไรบ้าง

ขั้นตอนที่ 1: ดาวน์โหลด Ledger Wallet

ไปที่เว็บไซต์ทางการของ Ledger ที่ ledger.com/ledger-live เพื่อดาวน์โหลดแอปพลิเคชัน Ledger Wallet สำหรับแพลตฟอร์มของคุณ แอปพลิเคชันมีให้สำหรับ Windows 10 หรือใหม่กว่า (64-bit), macOS 12 Monterey หรือใหม่กว่า, Ubuntu 20.04 LTS หรือใหม่กว่า, iOS 15 หรือใหม่กว่า และ Android 10 หรือใหม่กว่า ดาวน์โหลดจากเว็บไซต์ทางการของ Ledger หรือร้านแอปพลิเคชันทางการเสมอเพื่อหลีกเลี่ยงแอปพลิเคชันปลอม

ติดตั้งแอปพลิเคชันโดยทำตามกระบวนการติดตั้งมาตรฐานสำหรับระบบปฏิบัติการของคุณ บน Windows ให้เรียกใช้ไฟล์ติดตั้ง; บน macOS ให้ลากแอปพลิเคชันไปยังโฟลเดอร์ Applications; บน Linux ใช้ AppImage หรือติดตั้งผ่านแพ็กเกจที่ให้มา เวอร์ชันมือถือสามารถดาวน์โหลดได้จาก Apple App Store และ Google Play Store ตามลำดับ

เมื่อคุณเปิด Ledger Wallet เป็นครั้งแรก แอปพลิเคชันจะนำคุณผ่านตัวช่วยตั้งค่าเริ่มต้น หากคุณมีอุปกรณ์ Ledger ใหม่ที่ยังอยู่ในบรรจุภัณฑ์ ให้เลือก “ตั้งค่าอุปกรณ์ใหม่” หากคุณได้ตั้งค่าอุปกรณ์ของคุณก่อนหน้านี้แล้ว ให้เลือก “เชื่อมต่ออุปกรณ์ที่มีอยู่” เพื่อจับคู่กับแอปพลิเคชัน

ขั้นตอนที่ 2: เชื่อมต่ออุปกรณ์ Ledger ของคุณ

เชื่อมต่อกระเป๋าเงินฮาร์ดแวร์ Ledger ของคุณกับคอมพิวเตอร์โดยใช้สาย USB ที่ให้มา หรือจับคู่ผ่าน Bluetooth หากคุณใช้ Nano X, Stax หรือ Flex กับแอปพลิเคชันมือถือ ตรวจสอบให้อุปกรณ์ของคุณเปิดอยู่และปลดล็อกด้วยรหัส PIN ก่อนพยายามเชื่อมต่อ

Ledger Wallet จะตรวจจับอุปกรณ์ที่เชื่อมต่อของคุณโดยอัตโนมัติและแสดงรุ่นของอุปกรณ์ เวอร์ชันเฟิร์มแวร์ และสถานะการเชื่อมต่อ หากนี่เป็นครั้งแรกที่คุณเชื่อมต่อ คุณอาจได้รับการแจ้งให้อนุญาตการเชื่อมต่อบนอุปกรณ์ของคุณโดยการกดปุ่มที่เหมาะสมหรือแตะการยืนยันบนหน้าจอสัมผัส (สำหรับรุ่น Stax และ Flex)

สำหรับการเชื่อมต่อ USB ใช้เฉพาะสายที่ให้มากับอุปกรณ์ของคุณหรือสาย USB-C/USB-A ที่ได้รับการรับรอง หลีกเลี่ยงฮับ USB หรือสายต่อ USB เนื่องจากอาจทำให้การเชื่อมต่อไม่เสถียรได้ สำหรับการจับคู่ Bluetooth ตรวจสอบให้แน่ใจว่า Bluetooth เปิดอยู่บนอุปกรณ์มือถือของคุณและ Ledger ของคุณอยู่ในโหมดจับคู่ (เข้าถึงได้ผ่านเมนูการตั้งค่าของอุปกรณ์ Ledger)

ขั้นตอนที่ 3: รายการตรวจสอบความปลอดภัย

Ledger Wallet มีรายการตรวจสอบความปลอดภัยที่ครอบคลุมซึ่งตรวจสอบว่าอุปกรณ์ของคุณเป็นของแท้ ตั้งค่าอย่างถูกต้อง และใช้เฟิร์มแวร์ล่าสุด ขั้นตอนนี้มีความสำคัญอย่างยิ่งเพื่อให้แน่ใจว่ากระเป๋าเงินฮาร์ดแวร์ของคุณไม่ได้ถูกดัดแปลงและทำงานด้วยแพตช์ความปลอดภัยล่าสุด

รายการตรวจสอบความปลอดภัยดำเนินการตรวจสอบดังต่อไปนี้: การตรวจสอบความถูกต้องของอุปกรณ์โดยใช้การรับรองทางเข้ารหัสของ Ledger (ยืนยันว่าชิป Secure Element เป็นของแท้และไม่ได้ถูกเปลี่ยนหรือแก้ไข), การตรวจสอบเวอร์ชันเฟิร์มแวร์พร้อมการแจ้งเตือนการอัปเดตอัตโนมัติหากมีเวอร์ชันใหม่, การตรวจสอบรหัส PIN เพื่อยืนยันว่าคุณได้ตั้งค่ารหัส PIN ที่แข็งแรง, และการยืนยันการสำรองวลีการกู้คืนเพื่อให้แน่ใจว่าคุณได้บันทึกวลีการกู้คืน 24 คำอย่างถูกต้อง

หากมีการอัปเดตเฟิร์มแวร์ เราขอแนะนำอย่างยิ่งให้ติดตั้งก่อนดำเนินการต่อ การอัปเดตเฟิร์มแวร์มักจะรวมถึงการปรับปรุงความปลอดภัยที่สำคัญ การรองรับแอปบล็อกเชนใหม่ และการปรับปรุงประสิทธิภาพ กระบวนการอัปเดตได้รับการแนะนำภายใน Ledger Wallet และใช้เวลาประมาณ 5–10 นาทีในการดำเนินการเสร็จสิ้น บัญชีและวลีการกู้คืนของคุณจะไม่ได้รับผลกระทบจากการอัปเดตเฟิร์มแวร์

ขั้นตอนที่ 4: เพิ่มบัญชีคริปโตเคอเรนซี่

เมื่ออุปกรณ์ของคุณเชื่อมต่อและรายการตรวจสอบความปลอดภัยเสร็จสมบูรณ์ คุณสามารถเริ่มเพิ่มบัญชีคริปโตเคอเรนซี่ได้ คลิก “เพิ่มบัญชี” ใน Ledger Wallet และเลือกเครือข่ายบล็อกเชนที่คุณต้องการเพิ่ม เช่น Bitcoin, Ethereum, Solana หรือสินทรัพย์ที่รองรับกว่า 5,500 รายการ

Ledger Wallet จะแจ้งให้คุณติดตั้งแอปพลิเคชันบล็อกเชนที่เกี่ยวข้องบนอุปกรณ์ Ledger ของคุณหากยังไม่มีอยู่ แอปอุปกรณ์เป็นโปรแกรมขนาดเล็กที่ทำงานบนกระเป๋าเงินฮาร์ดแวร์ของคุณและจัดการการดำเนินการทางเข้ารหัสที่เฉพาะเจาะจงสำหรับแต่ละบล็อกเชน การติดตั้งแอปใช้เวลาเพียงไม่กี่วินาทีและไม่ส่งผลกระทบต่อบัญชีหรือวลีการกู้คืนที่มีอยู่ของคุณ

เมื่อแอปติดตั้งและเปิดบนอุปกรณ์ของคุณ Ledger Wallet จะสร้างที่อยู่บัญชีของคุณจากวลีการกู้คืนและซิงโครไนซ์ยอดคงเหลือและประวัติการทำธุรกรรมของคุณจากบล็อกเชน คุณสามารถเพิ่มบัญชีหลายบัญชีสำหรับเครือข่ายเดียวกันเพื่อจัดระเบียบการถือครองของคุณ — เช่น บัญชีแยกสำหรับการออม การซื้อขาย และกิจกรรม DeFi

ขั้นตอนที่ 5: ส่งและรับคริปโตเคอเรนซี่

เพื่อรับคริปโตเคอเรนซี่ ให้ไปที่บัญชีที่คุณต้องการรับและคลิก “รับ” Ledger Wallet จะแสดงที่อยู่รับของคุณพร้อมกับรหัส QR ที่สำคัญ ที่อยู่นี้จะแสดงบนหน้าจอกระเป๋าเงินฮาร์ดแวร์ของคุณเพื่อการตรวจสอบ — ยืนยันเสมอว่าที่อยู่ที่แสดงในแอปพลิเคชันตรงกับที่อยู่บนอุปกรณ์ของคุณก่อนแชร์กับใคร

เพื่อส่งคริปโตเคอเรนซี่ คลิก “ส่ง” จากบัญชีที่เกี่ยวข้อง ป้อนที่อยู่ผู้รับและจำนวนที่คุณต้องการโอน และตรวจสอบรายละเอียดการทำธุรกรรมรวมถึงค่าธรรมเนียมเครือข่าย เมื่อคุณคลิก “ดำเนินการต่อ” รายละเอียดการทำธุรกรรมจะถูกส่งไปยังกระเป๋าเงินฮาร์ดแวร์ของคุณเพื่อการลงนาม ตรวจสอบที่อยู่ผู้รับ จำนวน และค่าธรรมเนียมบนหน้าจออุปกรณ์ของคุณโดยใช้ Clear Signing จากนั้นยืนยันโดยการกดปุ่มทางกายภาพหรือแตะหน้าจอสัมผัส

การทำธุรกรรมจะถูกส่งไปยังเครือข่ายบล็อกเชนหลังจากที่คุณยืนยันทางกายภาพบนอุปกรณ์ Ledger ของคุณ ความต้องการการยืนยันทางกายภาพนี้เป็นสิ่งที่ทำให้ Ledger มีความปลอดภัยมากกว่ากระเป๋าเงินซอฟต์แวร์ — แม้ว่ามัลแวร์บนคอมพิวเตอร์ของคุณจะแก้ไขที่อยู่ที่แสดง รายละเอียดการทำธุรกรรมที่แท้จริงจะปรากฏบนหน้าจอกระเป๋าเงินฮาร์ดแวร์ที่เชื่อถือได้ของคุณ

ขั้นตอนที่ 6: สเตคสินทรัพย์ของคุณ

ไปที่ส่วน “Earn” หรือ “Staking” ใน Ledger Wallet เพื่อเริ่มรับรางวัลจากสินทรัพย์ proof-of-stake ของคุณ เลือกคริปโตเคอเรนซี่ที่คุณต้องการสเตค (ETH, SOL, DOT, ATOM เป็นต้น) และเลือกผู้ให้บริการสเตคจากตัวเลือกที่มีอยู่ ผู้ให้บริการแต่ละรายจะแสดง APY ปัจจุบัน อัตราค่าคอมมิชชั่น และเมตริกความน่าเชื่อถือเพื่อช่วยคุณเลือกอย่างมีข้อมูล

ป้อนจำนวนที่คุณต้องการสเตคและตรวจสอบเงื่อนไข สำหรับ Ethereum คุณสามารถสเตคจำนวนใดก็ได้ผ่านผู้ให้บริการสเตคแบบรวม เช่น Lido หรือ Kiln และรับโทเค็นสเตคแบบสภาพคล่องเป็นการตอบแทน สำหรับเครือข่ายเช่น Solana และ Cosmos คุณจะมอบหมายโดยตรงให้กับตัวตรวจสอบที่คุณเลือก การทำธุรกรรมสเตคทั้งหมดต้องการการยืนยันบนกระเป๋าเงินฮาร์ดแวร์ของคุณก่อนดำเนินการ

หลังจากสเตค Ledger Wallet จะติดตามรางวัลที่คุณสะสมโดยอัตโนมัติ แสดง APY ปัจจุบันของคุณ และให้กราฟรายได้ในอดีต คุณสามารถยกเลิกการสเตคสินทรัพย์ของคุณได้ทุกเมื่อ โดยขึ้นอยู่กับระยะเวลาการปลดล็อกเฉพาะของแต่ละเครือข่ายบล็อกเชน (เช่น Ethereum มีคิวการถอนตัวแปร ในขณะที่ Cosmos มีระยะเวลาปลดล็อก 21 วัน)

ขั้นตอนที่ 7: แลกเปลี่ยนคริปโต

เพื่อแลกเปลี่ยนคริปโตเคอเรนซี่หนึ่งเป็นอีกหนึ่ง ให้ไปที่ส่วน “Swap” ใน Ledger Wallet เลือกโทเค็นที่คุณต้องการแลกเปลี่ยน (สินทรัพย์ “จาก”) และโทเค็นที่คุณต้องการรับ (สินทรัพย์ “ถึง”) จากนั้นป้อนจำนวน Ledger Wallet จะสอบถามผู้ให้บริการแลกเปลี่ยนหลายรายพร้อมกันและแสดงราคาจากแต่ละราย รวมถึงอัตราแลกเปลี่ยน ค่าธรรมเนียมเครือข่าย และค่าธรรมเนียมผู้ให้บริการ

เปรียบเทียบราคาที่แสดงเพื่อค้นหาอัตราที่ดีที่สุดสำหรับการแลกเปลี่ยนของคุณ ราคาสามารถแตกต่างกันอย่างมากระหว่างผู้ให้บริการขึ้นอยู่กับคู่โทเค็น ขนาดการแลกเปลี่ยน และสภาพคล่องปัจจุบัน เมื่อคุณเลือกผู้ให้บริการ ตรวจสอบรายละเอียดการทำธุรกรรมทั้งหมดและยืนยันการแลกเปลี่ยนบนกระเป๋าเงินฮาร์ดแวร์ของคุณ การทำธุรกรรมที่ส่งออกจะถูกลงนามโดยอุปกรณ์ Ledger ของคุณ และโทเค็นที่ได้รับจะถูกฝากโดยตรงในบัญชีกระเป๋าเงินฮาร์ดแวร์ของคุณ

ผู้ให้บริการแลกเปลี่ยนที่รองรับรวมถึง Changelly, 1inch, Paraswap และอื่นๆ โดยครอบคลุมคู่โทเค็นหลายร้อยคู่ในเครือข่ายบล็อกเชนหลายแห่ง กระบวนการแลกเปลี่ยนทั้งหมดเสร็จสิ้นภายใน Ledger Wallet โดยไม่จำเป็นต้องเยี่ยมชมการแลกเปลี่ยนภายนอกหรือเชื่อมต่อกระเป๋าเงินของคุณกับเว็บไซต์ของบุคคลที่สาม ลดความเสี่ยงต่อการโจมตีฟิชชิ่งและแอปพลิเคชันที่เป็นอันตราย