Youtube에서 검색!

Ledger Live 는

Ledger Wallet (formerly Ledger Live) is a comprehensive cryptocurrency management application that pairs with Ledger hardware wallets to provide secure portfolio tracking, staking, swapping, and DeFi access across 5,500+ digital assets.

Ledger Live는 사용자에게 디지털 경험에 대한 완전한 제어권을 제공하도록 설계된 강력한 동반 애플리케이션입니다. Ledger Live는 데이터를 보호하면서 안전하게 활동을 관리할 수 있게 합니다. 사용성과 보안을 결합하여 Ledger Live는 모든 활동의 중앙 허브 역할을 합니다.

작동 방식 Ledger Live

Ledger Live는 계정에 직접 연결되어 민감한 데이터가 장치를 절대 떠나지 않도록 보장합니다. 모든 작업은 확인이 필요하며, 무단 액세스로부터 사용자를 보호합니다. Ledger Live는 인터페이스 역할을 하며, 보안은 모든 수준에서 적용됩니다.

Ledger Live의 주요 기능

Follow these steps to set up Ledger Wallet and start managing your crypto portfolio with hardware wallet security TL;DR — Quick Setup Steps Download Ledger Wallet for desktop (Windows, macOS, Linux) or mobile (iOS, Android) Connect your Ledger hardware wallet via USB or Bluetooth and complete the pairing process Run the security checklist to verify device authenticity and update firmware Add cryptocurrency accounts for Bitcoin, Ethereum, and any other supported networks Start sending, receiving, staking, and swapping — all secured by hardware wallet signing Setting up Ledger Wallet is a straightforward process that takes approximately 15–20 minutes from download to your first transaction. This guide walks you through each step in detail, ensuring your hardware wallet is properly configured and secured before you begin managing your digital assets. If you are new to Ledger, we recommend reading our features overview first to understand what the application offers.

Ledger Live에서의 자산 관리

The application is available for Windows 10 or later (64-bit), macOS 12 Monterey or later, Ubuntu 20.04 LTS or later, iOS 15 or later, and Android 10 or later. Always download from the official Ledger website or official app stores to avoid counterfeit applications. Install the application by following the standard installation process for your operating system.

보안이 핵심

Mobile versions are available through the Apple App Store and Google Play Store respectively. When you launch Ledger Wallet for the first time, the application will guide you through an initial setup wizard. If you have a new Ledger device still in its packaging, select “Set up a new device”.

Ledger Live와 자기 보관

Step 2: Connect Your Ledger Device Connect your Ledger hardware wallet to your computer using the included USB cable, or pair it via Bluetooth if you are using a Nano X, Stax, or Flex with the mobile application. Ensure your device is powered on and unlocked with your PIN code before attempting to connect. Ledger Wallet will automatically detect your connected device and display its model, firmware version, and connection status.

구매, 판매 및 교환

For USB connections, use only the cable provided with your device or a certified USB-C/USB-A cable. Avoid USB hubs or extension cables, as these can sometimes cause unreliable connections. For Bluetooth pairing, ensure Bluetooth is enabled on your mobile device and that your Ledger is in pairing mode (accessible through the Ledger device’s settings menu).

Ledger Live에서의 스왑

This step is critical for ensuring your hardware wallet has not been tampered with and is operating with the most current security patches. The security checklist performs the following checks: device authenticity verification using Ledger’s cryptographic attestation (confirming the Secure Element chip is genuine and has not been replaced or modified), firmware version check with automatic update prompts if a newer version is available, PIN code verification to confirm you have set a strong PIN, and recovery phrase backup confirmation to ensure you have properly recorded your 24-word recovery phrase. If a firmware update is available, we strongly recommend installing it before proceeding.

Ledger Live로 스테이킹

The update process is guided within Ledger Wallet and typically takes 5–10 minutes to complete. Your accounts and recovery phrase are not affected by firmware updates. Step 4: Add Cryptocurrency Accounts With your device connected and security checklist complete, you can begin adding cryptocurrency accounts.

지원되는 스테이킹 자산

Ledger Wallet will prompt you to install the corresponding blockchain application on your Ledger device if it is not already present. Device apps are small programs that run on your hardware wallet and handle the cryptographic operations specific to each blockchain. Installing an app takes just a few seconds and does not affect your existing accounts or seed phrase.

Ledger Live와 DeFi 접근

You can add multiple accounts for the same network to organize your holdings — for example, separate accounts for savings, trading, and DeFi activities. Step 5: Send & Receive Cryptocurrency To receive cryptocurrency, navigate to the account you want to receive into and click “Receive”. Ledger Wallet will display your receiving address along with a QR code.

WalletConnect 및 DApp 통합

To send cryptocurrency, click “Send” from the relevant account, enter the recipient address and the amount you wish to transfer, and review the transaction details including the network fee. When you click “Continue”, the transaction details are sent to your hardware wallet for signing. Review the recipient address, amount, and fee on your device screen using Clear Signing, then confirm by pressing the physical button or tapping the touchscreen.

Ledger Live 모바일 및 데스크톱

This hardware confirmation requirement is what makes Ledger fundamentally more secure than software wallets — even if malware on your computer modifies the displayed address, the true transaction details appear on your trusted hardware wallet screen. Step 6: Stake Your Assets Navigate to the “Earn” or “Staking” section in Ledger Wallet to begin earning rewards on your proof-of-stake assets. Select the cryptocurrency you want to stake (ETH, SOL, DOT, ATOM, etc.) and choose a staking provider from the available options.

사용자 경험 및 인터페이스

Enter the amount you wish to stake and review the terms. For Ethereum, you can stake any amount through pooled staking providers like Lido or Kiln and receive a liquid staking token in return. For networks like Solana and Cosmos, you delegate directly to a validator of your choice.

개인정보 보호 및 규정 준수

After staking, Ledger Wallet automatically tracks your accumulated rewards, displays your current APY, and provides historical earnings charts. You can unstake your assets at any time, subject to the unbonding period specific to each blockchain network (for example, Ethereum has a variable withdrawal queue, while Cosmos has a 21-day unbonding period). Step 7: Swap Crypto To swap one cryptocurrency for another, navigate to the “Swap” section in Ledger Wallet.

Ledger Live와 투명성

Ledger Wallet will query multiple swap providers simultaneously and display quotes from each one, including the exchange rate, network fees, and provider fees. Compare the quotes to find the best rate for your specific trade. Rates can vary significantly between providers depending on the token pair, trade size, and current liquidity conditions.

Ledger Live의 미래

The outgoing transaction is signed by your Ledger device, and the received tokens are deposited directly into your hardware wallet account. Supported swap providers include Changelly, 1inch, Paraswap, and others, with coverage spanning hundreds of token pairs across multiple blockchain networks. The entire swap process is completed within Ledger Wallet, with no need to visit external exchanges or connect your wallet to third-party websites, reducing your exposure to phishing attacks and malicious dApps.

Web3 생태계에서의 Ledger Live

Ledger Live는 최첨단 기술을 활용하여 뛰어난 성능을 제공합니다. Ledger Live를 통해 사용자는 초보자와 고급 사용자 모두를 위해 설계된 기능에 접근할 수 있습니다.

Ledger Wallet을 하드웨어 장치와 설정하는 방법을 단계별로 보여주는 시각적 가이드, 앱 다운로드부터 암호화폐 계정 관리까지
이 단계를 따라 Ledger Wallet을 설정하고 하드웨어 월렛 보안으로 암호화폐 포트폴리오를 관리하세요
TL;DR — 빠른 설정 단계
  • 데스크톱(Windows, macOS, Linux) 또는 모바일(iOS, Android)용 Ledger Wallet 다운로드
  • USB 또는 Bluetooth를 통해 Ledger 하드웨어 월렛을 연결하고 페어링 프로세스를 완료하세요
  • 보안 체크리스트를 실행하여 장치의 진위 여부를 확인하고 펌웨어를 업데이트하세요
  • Bitcoin, Ethereum 및 지원되는 기타 네트워크의 암호화폐 계정을 추가하세요
  • 하드웨어 월렛 서명을 통해 안전하게 송금, 수신, 스테이킹 및 스왑을 시작하세요

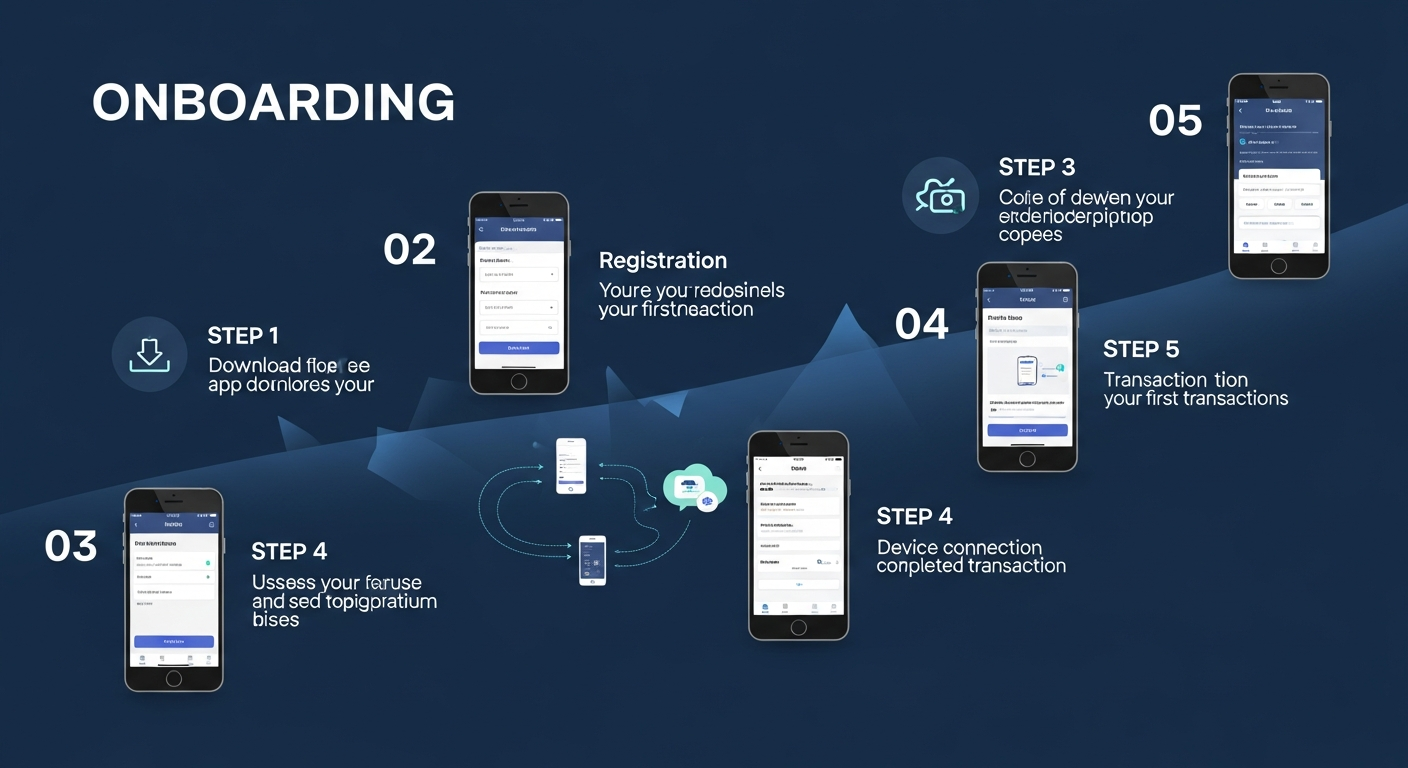
Ledger Wallet 설정은 다운로드부터 첫 거래까지 약 15–20분 정도 소요되는 간단한 과정입니다. 이 가이드는 각 단계를 자세히 안내하여 하드웨어 월렛이 올바르게 구성되고 보안이 유지된 상태에서 디지털 자산을 관리할 수 있도록 합니다. Ledger를 처음 사용하는 경우, 애플리케이션이 제공하는 기능을 이해하기 위해 먼저 기능 개요를 읽는 것을 권장합니다.

1단계: Ledger Wallet 다운로드

ledger.com/ledger-live의 공식 Ledger 웹사이트를 방문하여 플랫폼에 맞는 Ledger Wallet 애플리케이션을 다운로드하세요. 애플리케이션은 Windows 10 이상(64비트), macOS 12 Monterey 이상, Ubuntu 20.04 LTS 이상, iOS 15 이상, Android 10 이상에서 사용할 수 있습니다. 항상 공식 Ledger 웹사이트 또는 공식 앱 스토어에서 다운로드하여 위조 애플리케이션을 피하세요.

운영 체제에 따라 표준 설치 과정을 따라 애플리케이션을 설치하세요. Windows에서는 실행 파일을 실행하고, macOS에서는 애플리케이션을 응용 프로그램 폴더로 드래그하며, Linux에서는 AppImage를 사용하거나 제공된 패키지를 설치하세요. 모바일 버전은 Apple App Store와 Google Play Store에서 각각 사용할 수 있습니다.

Ledger Wallet을 처음 실행하면 초기 설정 마법사가 안내를 제공합니다. 새 Ledger 장치를 처음 사용하는 경우 “새 장치 설정”을 선택하세요. 이미 장치를 초기화한 경우 “기존 장치 연결”을 선택하여 애플리케이션과 페어링하세요.

2단계: Ledger 장치 연결

포함된 USB 케이블을 사용하여 Ledger 하드웨어 월렛을 컴퓨터에 연결하거나, Nano X, Stax 또는 Flex를 사용하는 경우 모바일 애플리케이션을 통해 Bluetooth로 페어링하세요. 연결을 시도하기 전에 장치가 켜져 있고 PIN 코드로 잠금 해제되어 있는지 확인하세요.

Ledger Wallet은 연결된 장치를 자동으로 감지하고 모델, 펌웨어 버전 및 연결 상태를 표시합니다. 처음 연결하는 경우 장치에서 적절한 버튼을 누르거나 터치스크린에서 확인을 눌러 연결을 허용하라는 메시지가 표시될 수 있습니다(Stax 및 Flex 모델의 경우).

USB 연결의 경우 장치와 함께 제공된 케이블 또는 인증된 USB-C/USB-A 케이블만 사용하세요. USB 허브나 연장 케이블은 신뢰할 수 없는 연결을 유발할 수 있으므로 피하세요. Bluetooth 페어링의 경우 모바일 장치에서 Bluetooth가 활성화되어 있고 Ledger 장치가 페어링 모드에 있는지 확인하세요(Ledger 장치의 설정 메뉴에서 접근 가능).

3단계: 보안 체크리스트

Ledger Wallet에는 장치가 진품인지, 올바르게 구성되었는지, 최신 펌웨어를 실행 중인지 확인하는 포괄적인 보안 체크리스트가 포함되어 있습니다. 이 단계는 하드웨어 월렛이 조작되지 않았고 최신 보안 패치를 사용 중인지 확인하는 데 중요합니다.

보안 체크리스트는 다음 검사를 수행합니다: Ledger의 암호학적 인증을 사용하여 장치 진품 확인(보안 요소 칩이 진품이며 교체되거나 수정되지 않았음을 확인), 펌웨어 버전 확인 및 최신 버전이 있는 경우 자동 업데이트 알림, 강력한 PIN 코드 설정 확인, 24단어 복구 문구를 올바르게 기록했는지 확인.

펌웨어 업데이트가 가능한 경우 진행하기 전에 설치하는 것을 강력히 권장합니다. 펌웨어 업데이트는 중요한 보안 개선, 새로운 블록체인 앱 지원 및 성능 향상을 포함하는 경우가 많습니다. 업데이트 과정은 Ledger Wallet 내에서 안내되며 일반적으로 완료하는 데 5–10분 정도 소요됩니다. 계정과 복구 문구는 펌웨어 업데이트에 영향을 받지 않습니다.

4단계: 암호화폐 계정 추가

장치를 연결하고 보안 체크리스트를 완료한 후 암호화폐 계정을 추가할 수 있습니다. Ledger Wallet에서 “계정 추가”를 클릭하고 Bitcoin, Ethereum, Solana 또는 5,500개 이상의 지원 자산 중 추가하려는 블록체인 네트워크를 선택하세요.

Ledger Wallet은 Ledger 장치에 해당 블록체인 애플리케이션이 설치되어 있지 않은 경우 설치를 요청합니다. 장치 앱은 하드웨어 월렛에서 실행되는 작은 프로그램으로 각 블록체인에 특화된 암호학적 작업을 처리합니다. 앱 설치는 몇 초 만에 완료되며 기존 계정이나 시드 문구에 영향을 미치지 않습니다.

앱이 설치되고 장치에서 열리면 Ledger Wallet은 시드 문구에서 계정 주소를 파생하고 블록체인에서 잔액과 거래 내역을 동기화합니다. 동일한 네트워크에 대해 여러 계정을 추가하여 보유 자산을 조직할 수 있습니다 — 예를 들어, 저축, 거래 및 DeFi 활동을 위한 별도 계정.

5단계: 암호화폐 송금 및 수신

암호화폐를 수신하려면 수신하려는 계정으로 이동하여 “수신”을 클릭하세요. Ledger Wallet은 QR 코드와 함께 수신 주소를 표시합니다. 중요한 점은 주소가 하드웨어 월렛 화면에도 표시된다는 것입니다 — 애플리케이션에 표시된 주소가 장치에 표시된 주소와 일치하는지 항상 확인한 후 공유하세요.

암호화폐를 송금하려면 관련 계정에서 “송금”을 클릭하고 수신자 주소와 송금하려는 금액을 입력한 후 네트워크 수수료를 포함한 거래 세부 정보를 검토하세요. “계속”을 클릭하면 거래 세부 정보가 하드웨어 월렛으로 전송되어 서명됩니다. Clear Signing을 사용하여 장치 화면에서 수신자 주소, 금액 및 수수료를 검토한 후 물리적 버튼을 누르거나 터치스크린을 눌러 확인하세요.

Ledger 장치에서 물리적으로 확인한 후에만 거래가 블록체인 네트워크에 브로드캐스트됩니다. 이 하드웨어 확인 요구 사항은 Ledger가 소프트웨어 월렛보다 근본적으로 더 안전하게 만드는 이유입니다 — 컴퓨터의 악성 소프트웨어가 표시된 주소를 수정하더라도 실제 거래 세부 정보는 신뢰할 수 있는 하드웨어 월렛 화면에 표시됩니다.

6단계: 자산 스테이킹

Ledger Wallet의 “Earn” 또는 “Staking” 섹션으로 이동하여 스테이킹 자산에서 보상을 받기 시작하세요. 스테이킹하려는 암호화폐(ETH, SOL, DOT, ATOM 등)를 선택하고 사용 가능한 옵션 중 스테이킹 제공자를 선택하세요. 각 제공자는 현재 APY, 수수료율 및 신뢰성 지표를 표시하여 정보에 입각한 선택을 할 수 있도록 돕습니다.

스테이킹하려는 금액을 입력하고 조건을 검토하세요. Ethereum의 경우 Lido 또는 Kiln과 같은 풀 스테이킹 제공자를 통해 모든 금액을 스테이킹하고 그 대가로 유동 스테이킹 토큰을 받을 수 있습니다. Solana 및 Cosmos와 같은 네트워크의 경우 선택한 검증자에게 직접 위임합니다. 모든 스테이킹 거래는 실행 전에 하드웨어 월렛에서 확인이 필요합니다.

스테이킹 후 Ledger Wallet은 누적 보상을 자동으로 추적하고 현재 APY를 표시하며 과거 수익 차트를 제공합니다. 각 블록체인 네트워크의 특정 언본딩 기간에 따라 언제든지 자산을 언스테이킹할 수 있습니다(예: Ethereum은 가변적인 출금 대기열을 가지며 Cosmos는 21일 언본딩 기간이 있습니다).

7단계: 암호화폐 스왑

한 암호화폐를 다른 암호화폐로 스왑하려면 Ledger Wallet의 “Swap” 섹션으로 이동하세요. 교환하려는 토큰(“출발” 자산)과 받을 토큰(“도착” 자산)을 선택한 후 금액을 입력하세요. Ledger Wallet은 여러 스왑 제공자를 동시에 조회하고 각 제공자의 환율, 네트워크 수수료 및 제공자 수수료를 포함한 견적을 표시합니다.

특정 거래에 가장 좋은 환율을 찾기 위해 견적을 비교하세요. 제공자 간 환율은 토큰 쌍, 거래 크기 및 현재 유동성 조건에 따라 크게 다를 수 있습니다. 제공자를 선택한 후 전체 거래 세부 정보를 검토하고 하드웨어 월렛에서 스왑을 확인하세요. 송금 거래는 Ledger 장치에서 서명되며 받은 토큰은 하드웨어 월렛 계정에 직접 입금됩니다.

지원되는 스왑 제공자에는 Changelly, 1inch, Paraswap 등이 포함되며, 여러 블록체인 네트워크에서 수백 개의 토큰 쌍을 다룹니다. 전체 스왑 과정은 Ledger Wallet 내에서 완료되며 외부 거래소를 방문하거나 제3자 웹사이트에 월렛을 연결할 필요가 없어 피싱 공격 및 악성 dApp에 대한 노출을 줄입니다.